


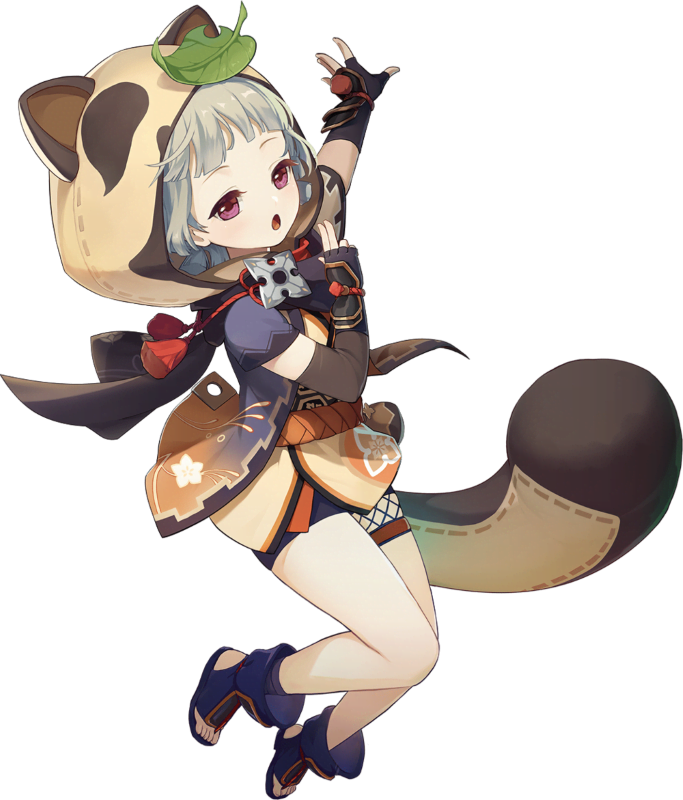
Sayu

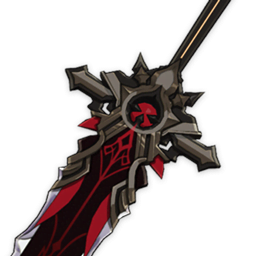
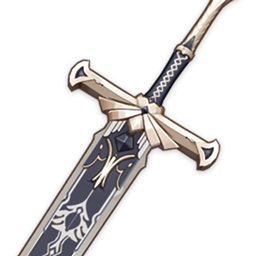
Claymore
A pint-sized ninja attached to the Shuumatsuban, who always seems sleep-deprived.
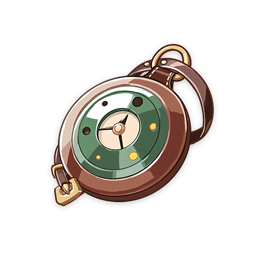
Talent Book

Light
Boss

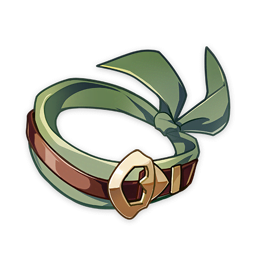
Ascension Materials


| ASC | LVL | HP | ATK | DEF | Elemental Mastery | Ascension Materials |
| 0 | 1 | 994 | 20 | 62 | 0 | |
| 20 | 2553 | 53 | 160 | |||
| 1 | 20 | 3296 | 68 | 207 | 0 |
 1
3
3
1
3
3
 20,000
|
| 40 | 4937 | 102 | 310 | |||
| 2 | 40 | 5464 | 113 | 343 | 24 |
3
2
10
15
40,000
|
| 50 | 6285 | 130 | 395 | |||
| 3 | 50 | 6988 | 144 | 439 | 48 |
6
4
20
 12
60,000
12
60,000
|
| 60 | 7809 | 161 | 491 | |||
| 4 | 60 | 8337 | 172 | 524 | 48 |
 3
8
30
18
80,000
3
8
30
18
80,000
|
| 70 | 9157 | 189 | 575 | |||
| 5 | 70 | 9684 | 200 | 608 | 72 |
6
12
45
 12
100,000
12
100,000
|
| 80 | 10505 | 216 | 660 | |||
| 6 | 80 | 11033 | 227 | 693 | 96 |
 6
20
60
24
120,000
6
20
60
24
120,000
|
| 90 | 11854 | 244 | 745 | |||
| 95 | 12263 | 275 | 770 | |||
| 100 | 12674 | 307 | 796 |
SUPPORT Build 👍
Sayu does more damage with EM builds and heals more with ATK hybrid builds, Healing Bonus circlet's can be used for better heals while maintaining respectable damage. Note that Sayu wants a large amount of Energy Recharge when used as the only Anemo slot on the team. Regarding Weapon Choices: Wolf's Gravestone: This is a universal claymore that is capable of buffing your teammates along with providing more healing in Sayu's case. It is best used once you achieve your ER threshold. Forest Regalia: When used in its niche with aggravate teams it can outpeform Katsuragikiri Nagamasa. Outside of that its just a Energy Recharge% stat stick. Regarding Artifact Sets: Viridescent Venerer (4): The bread and butter artifact set for Anemo units, this set provides the ability to shred the enemy's elemental resistance while also buffing Sayu's Swirl damage output.
ABILITY TIP
Use hold Skill then immediately press it to generate more particles.
MAIN STATS
 SANDS
SANDSEnergy Recharge / Elemental Mastery
 GOBLET
Elemental Mastery / ATK%
 CIRCLET
Healing Bonus / Elemental Mastery
SUB STATS
1. Energy Recharge
2. Elemental Mastery
3. ATK%
TALENT PRIORITY
Burst
Skill
WEAPONS
Wolfish Tracker
Increases ATK by 20%/25%/30%/35%/40%. On hit, attacks against opponents with less than 30% HP increase all party members' ATK by 40%/50%/60%/70%/80% for 12s. Can only occur once every 30s.
ATK
608
ATK
49.6%
1
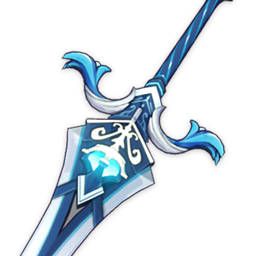
Wolf's Gravestone
Windfall
CRIT Hits have a 60%/70%/80%/90%/100% chance to generate a small amount of Elemental Particles, which will regenerate 6 Energy for the character. Can only occur once every 12/10.5/9/7.5/6s.
ATK
454
Energy Recharge
61.3%
2
Favonius Greatsword
Samurai Conduct
Increases Elemental Skill DMG by 6%/7.5%/9%/10.5%/12%. After Elemental Skill hits an opponent, the character loses 3 Energy but regenerates 3/3.5/4/4.5/5 Energy every 2s for the next 6s. This effect can occur once every 10s. Can be triggered even when the character is not on the field.
ATK
510
Energy Recharge
45.9%
3
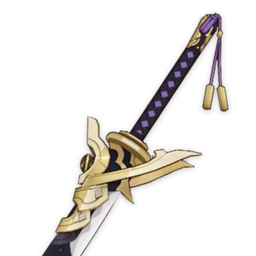
Katsuragikiri Nagamasa
Composed
After damaging an opponent with an Elemental Skill, the skill has a 40%/50%/60%/70%/80% chance to end its own CD. Can only occur once every 30/26/22s/19/16ss.
ATK
565
Energy Recharge
30.6%
4
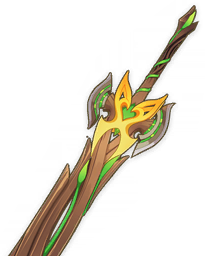
Sacrificial Greatsword
Forest Sanctuary
After triggering Burning, Quicken, Aggravate, Spread, Bloom, Lunar-Bloom, Hyperbloom, or Burgeon, a Leaf of Consciousness will be created around the character for a maximum of 10s. When picked up, the Leaf will grant the character 60/75/90/105/120 Elemental Mastery for 12s. Only 1 Leaf can be generated this way every 20s. This effect can still be triggered if the character is not on the field. The Leaf of Consciousness' effect cannot stack.
ATK
565
Energy Recharge
30.6%
5
Forest Regalia
Bane of Storm and Tide
Increases DMG against opponents affected by Hydro or Electro by 20%/24%/28%/32%/36%.
ATK
510
Elemental Mastery
165
6
Rainslasher
Bane of Fire and Thunder
Increases DMG dealt against opponents affected by Pyro or Electro by 12%/15%/18%/21%/24%.
ATK
354
Elemental Mastery
187
7
Bloodtainted Greatsword
ARTIFACTS


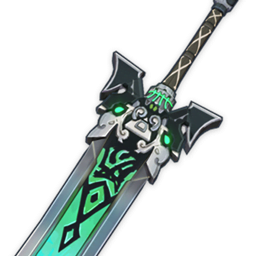
Shuumatsuban Ninja Blade
Normal Attack Performs up to 4 consecutive strikes. Charged Attack Drains Stamina over time to perform continuous spinning attacks against all nearby opponents. At the end of the sequence, performs a more powerful slash. Plunging Attack Plunges from mid-air to strike the ground below, damaging opponents along the path and dealing AoE DMG upon impact.

Yoohoo Art: Fuuin Dash
The special technique of the Yoohoo Ninja Arts! Sayu curls up into a rolling Fuufuu Windwheel and smashes into opponents at high speed, dealing Anemo DMG. When the duration ends, she unleashes a Fuufuu Whirlwind Kick, dealing AoE Anemo DMG. Press Enters the Fuufuu Windwheel state, rolling forward a short distance before using the Fuufuu Whirlwind Kick. Hold Rolls about continuously in the Fuufuu Windwheel state, increasing Sayu's resistance to interruption while within that state. During this time, Sayu can control the direction of her roll, and can use the skill again to end her Windwheel state early and unleash a stronger version of the Fuufuu Whirlwind Kick. The Hold version of this skill can trigger Elemental Absorption. This skill has a maximum duration of 10s and enters CD once its effects end. The longer Sayu remains in her Windwheel state, the longer the CD. Elemental Absorption If Sayu comes into contact with Hydro/Pyro/Cryo/Electro while in her Windwheel state, she will deal additional elemental DMG of that type. Elemental Absorption may only occur once per use of this skill.
Sayu can pull this skill off with her eyes closed. This technique was originally created for escaping, but now that she's got a Vision, might as well make her foes eat dirt while she's at it.

Yoohoo Art: Mujina Flurry
The other super special technique of the Yoohoo Ninja Arts! It summons a pair of helping hands for Sayu. Deals Anemo DMG to nearby opponents and heals all nearby party members. The amount of HP restored is based on Sayu's ATK. This skill then summons a Muji-Muji Daruma. Muji-Muji Daruma At specific intervals, the Daruma will take one of several actions based on the situation around it: - If the HP of nearby characters is above 70%, it will attack a nearby opponent, dealing Anemo DMG. - If there are active characters with 70% or less HP nearby, it will heal the active character with the lowest percentage HP left. If there are no opponents nearby, it will heal active characters nearby even if they have 70% HP or more.
People who don't know the first thing about ninjutsu love to watch Sayu show off this skill, and some have tried to learn it from her. But Sayu just wants to sleep and not be disturbed.
Passive Talents

Someone More Capable
When Sayu triggers a Swirl reaction while active, she heals all your characters and nearby allies for 300 HP. She will also heal an additional 1.2 HP for every point of Elemental Mastery she has. This effect can be triggered once every 2s.

No Work Today!
The Muji-Muji Daruma created by Yoohoo Art: Mujina Flurry gains the following effects: - When healing a character, it will also heal characters near that healed character for 20% the amount of HP. - Increases the AoE of its attack against opponents.

Yoohoo Art: Silencer's Secret
When Sayu is in the party, your characters will not startle Crystalflies and certain other animals when getting near them. Check the "Other" sub-category of the "Living Beings / Wildlife" section in the Archive for creatures this skill works on.
Multi-Task no Jutsu
The Muji-Muji Daruma created by Yoohoo Art: Mujina Flurry will ignore HP limits and can simultaneously attack nearby opponents and heal characters.

Egress Prep
Yoohoo Art: Fuuin Dash gains the following effects: - DMG of Fuufuu Whirlwind Kick in Press Mode increased by 3.3%. - Every 0.5s in the Fuufuu Windwheel state will increase the DMG of this Fuufuu Whirlwind Kick by 3.3%. The maximum DMG increase possible through this method is 66%.

Eh, the Bunshin Can Handle It
Increases the Level of Yoohoo Art: Mujina Flurry by 3. Maximum upgrade level is 15.

Skiving: New and Improved
Sayu recovers 1.2 Energy when she triggers a Swirl reaction. This effect occurs once every 2s.

Speed Comes First
Increases the Level of Yoohoo Art: Fuuin Dash by 3. Maximum upgrade level is 15.

Sleep O'Clock
The Muji-Muji Daruma created by Sayu's Yoohoo Art: Mujina Flurry will now also benefit from her Elemental Mastery. Each point of Sayu's Elemental Mastery will produce the following effects: - Increases the damage dealt by the Muji-Muji Daruma's attacks by 0.2% ATK. A maximum DMG increase of 400% ATK can be gained via this method. - Increases the HP restored by the Muji-Muji Daruma by 3. A maximum of 6,000 additional HP can be restored in this manner.